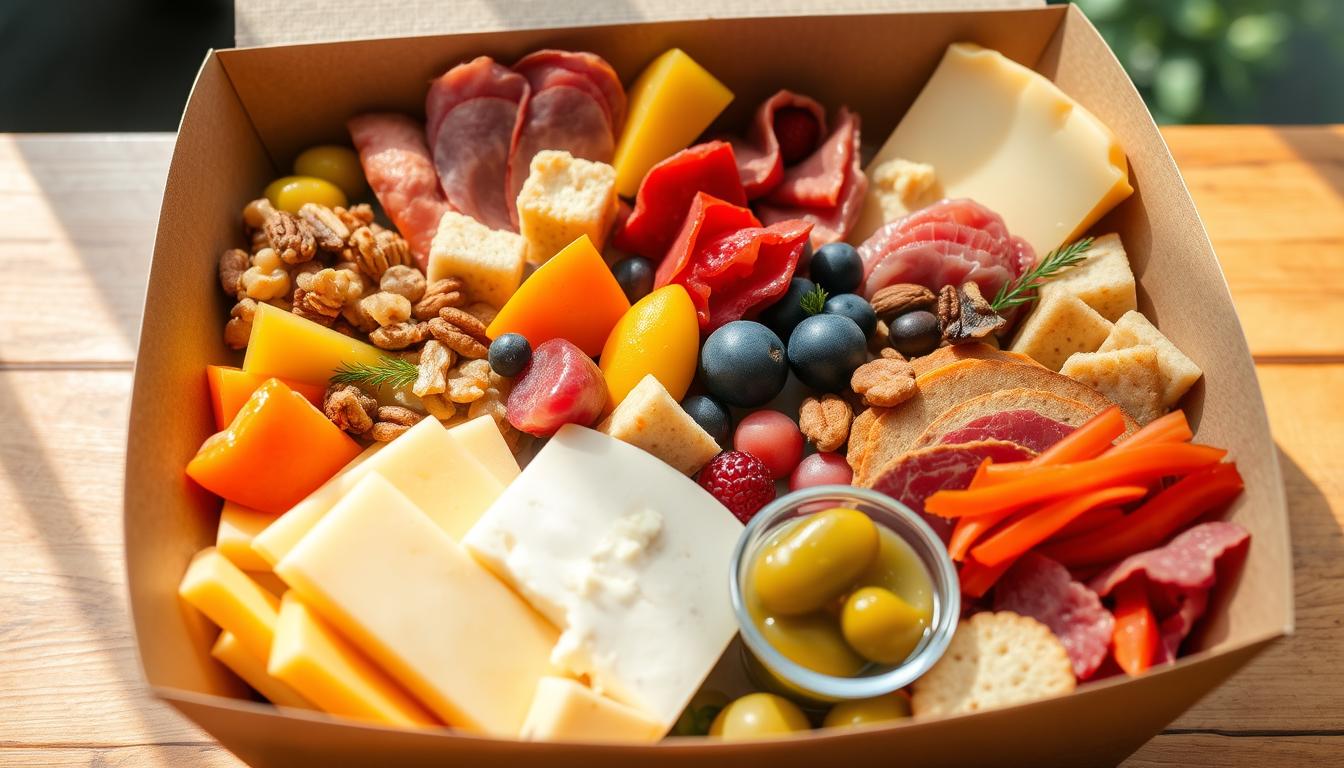
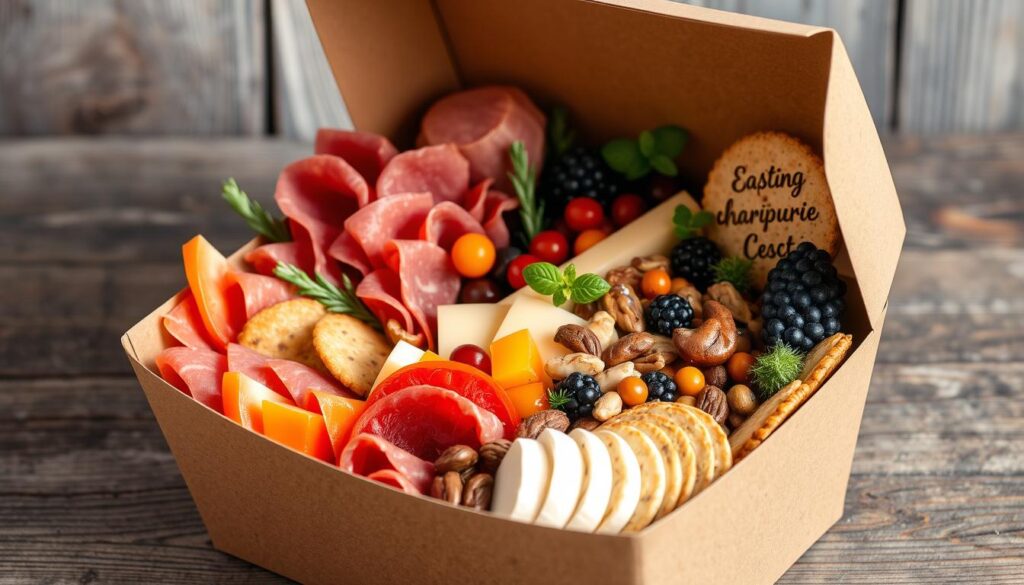
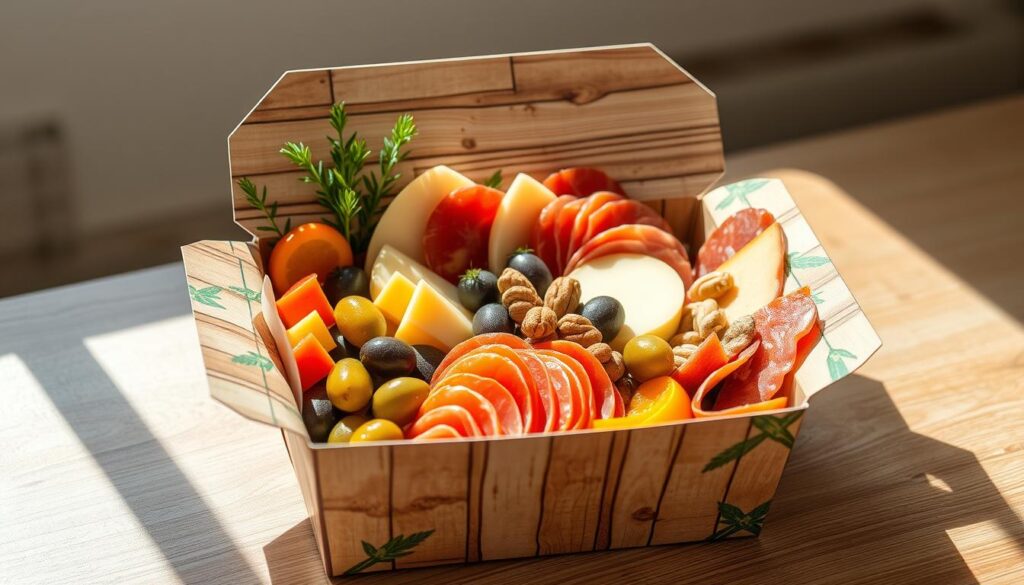
Paper lunch box charcuterie is a hit, offering a fun and personal way to eat. It became popular during the pandemic for serving single portions at events. Each box has meats, cheeses, fruits, and more, all in a 4×4″ paper box with a clear window.
These boxes are great for work events, special times, and even dates. They make enjoying a charcuterie experience easy and stylish, no matter where you are.
Key Takeaways
- Paper lunch box charcuterie offers a portable and personalized dining option.
- The boxes typically contain a variety of meats, cheeses, fruits, and accompaniments.
- These boxes are suitable for corporate events, special occasions, and personal use.
- The boxes are compact, measuring 4×4″ with a window for visual appeal.
- Preparing individual charcuterie boxes can be a fun and creative activity.
Understanding Paper Lunch Box Charcuterie Essentials
Creating a personal charcuterie in a paper lunch box is all about balance. You want a mix of flavors and textures. Aim for 1-2 oz of cured meat, 2-3 oz of cheese, crackers, fresh and dried fruit, and garnishes.
What Makes a Perfect Individual Serving
Paper lunch box charcuterie is great for portion control and personal touch. It’s about combining salty, sweet, and savory tastes. Choose high-quality meats, cheeses, and extras for a tasty and pretty dish.
Benefits of Individual Portions
Individual portions are good for controlling how much you eat and keeping food safe. They’re perfect for outdoor events or quick snacks. You can also make them fit special diets, like gluten-free or dairy-free.
Container Size and Selection
There are many sizes to choose from, like 4×4″ paper boxes or small bento boxes. Pick one that fits your charcuterie without being too big. Use airtight containers to keep food fresh and safe.
“Proper storage solutions and inventory management are crucial for maintaining the freshness and quality of charcuterie ingredients.”
Essential Supplies and Equipment Needed
To make a beautiful and useful charcuterie box, you need the right stuff. This includes serving containers and special tools. Each one is important for making your charcuterie look great.
For serving containers, think about using 4×4″ paper boxes, small bento boxes, or mini wood boards. They’re great for small portions and keep things tidy. Use parchment paper or food-safe tissue paper to line them up for a clean look.
- Serving containers: 4×4″ paper boxes, small bento boxes, or mini wood boards
- Parchment paper or food-safe tissue paper for lining
- Toothpicks for securing items and creating skewers
- Small plastic cups with lids for dips or jams
- Mini utensils like forks or honey dippers
You’ll also need special charcuterie tools to make your box look good. You’ll need cheese knives, slicers, and pate knives. These tools help you cut and spread food nicely. Using top-notch serving containers and food-safe materials makes your box look and feel great.
| Tool | Purpose |
|---|---|
| Cheese knives | Precise cuts for different cheese varieties |
| Slicers | Ensure consistency and uniformity in charcuterie cuts |
| Pate knives | Effortless spreading of pate |
Choosing the right charcuterie tools, serving containers, and food-safe materials is key. It lets you make a charcuterie box that’s both beautiful and useful. Your guests will love it, and so will your dining experience.
Selecting the Right Meats and Cheeses
Making a great paper lunch box charcuterie starts with picking the right meats and cheeses. Choose charcuterie meats that are full of flavor. They should look good in a small box.
Best Cured Meats for Box Presentation
- Italian dry salami, known for its savory, spicy, and sweet profile
- Prosciutto, a classic choice with a salty and savory taste
- Coppa, a delicately spiced and slightly smoky pork cold cut
- Soppressata, a versatile salami variety in sweet and spicy versions
- Saucisson sec, a French dried salami seasoned with salt, pepper, and garlic
- Bresaola, a lean cured meat with hints of spice like garlic and pepper
- Salami nuggets for their easy-to-grab size
Cheese Varieties and Portions
For cheese pairings, mix soft and hard cheeses. Some good options are:
| Soft Cheeses | Hard Cheeses |
|---|---|
| Brie, Havarti, Goat Cheese, Burrata, Cream Cheese with Pepper Jelly | Manchego, Cheddar, Swiss, Gouda, Gruyère, Parmesan |
Plan for about 1 oz of charcuterie meats and 2-3 oz of cheese per box. This mix makes your meat presentation both tasty and pretty.
Creating Attractive Meat Roses
To make your charcuterie look amazing, make a meat rose. Use 4-5 slices of salami in a circle and hold them together with a toothpick. This adds elegance and highlights the charcuterie meats.
Fresh and Dried Fruit Components
Make your paper lunch box charcuterie even better with fresh and dried fruits. These sweet treats balance out the savory meats and cheeses. They make for a complete and enjoyable meal.
Begin with seasonal fruits at their freshest. Add juicy berries, crisp apple slices, and plump grapes for color and flavor. For longer-lasting options, try dried fruit like apricots or cranberries. They pack a sweet punch that pairs well with the other items.
Include about 1/4 oz of fresh fruit and a few dried pieces in each box. This mix of fruit pairing makes your charcuterie box look good, taste great, and feel right.
“The mix of savory and sweet in a charcuterie box is irresistible. Fruits add that natural sweetness.”
Adding Complementary Elements
To make your paper lunch box charcuterie better, add different elements. These can be crunchy nuts, savory crackers, tasty dips, and garnishes. They boost the flavor and look of your dish.
Nuts and Crackers Selection
Choose 3-4 types of crackers like saltines, wheat thins, and breadsticks. They add texture and flavor to your meats and cheeses. Add nuts like almonds or walnuts for extra crunch and taste.
Dips and Spreads Options
Use small containers for dips like honey, fig jam, or Dijon mustard. They make your charcuterie accompaniments better and let guests pick their favorites. These flavor pairings bring more depth and variety to your dish.
Garnishing Elements
Make your charcuterie look great with fresh herbs like rosemary or basil. They smell good and add color. Edible flowers like nasturtiums or violas also make it look stunning.
By picking the right elements, your paper lunch box charcuterie will be tasty and beautiful. It will impress your guests and make a memorable experience.
Paper Lunch Box Charcuterie Assembly Steps
Creating a beautiful paper lunch box charcuterie starts with lining the box with parchment paper. This makes the base clean and ready. Then, place the cured meats and cheeses in the box, spreading them out evenly.
Next, fill the empty spots with crackers for a nice crunch. Arrange fresh fruits and veggies around the edges to add color and sweetness. This makes the box look great and taste even better.
Remember to add dips or spreads to enhance the flavors. Then, add nuts, olives, or other treats to fill any last spots. This makes the charcuterie arrangement look stunning.
The goal is to make the box assembly both beautiful and useful. Mix different shapes, sizes, and textures to excite the senses and please the taste buds.
- Line the interior of the box with parchment paper.
- Arrange the larger items like cured meats and cheeses first.
- Fill in the gaps with an assortment of crackers.
- Carefully place fresh fruits and vegetables around the perimeter.
- Include small containers of dips or spreads to complement the components.
- Sprinkle in nuts, olives, or other small treats to fill any remaining spaces.
- Ensure the final presentation is visually appealing and practical.
| Item | Quantity |
|---|---|
| Salame Secchi Log | 1 |
| White Cheddar | 4 oz |
| Medium Cheddar | 4 oz |
| Green Grapes | 1 cup |
| Red Apple | 1 |
| Persian Cucumber | 1 |
| Baby Carrots | 1/2 cup |
| Cherry Tomatoes | 1/2 cup |
| Celery | 4 sticks |
| Goldfish Crackers | 1/2 cup |
| Cheez-its Crackers | 1/2 cup |
| Pretzels | 1/2 cup |
| Fig & Olive Crackers | 1/2 cup |
| Scandinavian Swimmers | 1/4 cup |
| Sour Patch Kids | 1/4 cup |
Storage and Food Safety Guidelines
Creating the perfect paper lunch box charcuterie means keeping food safety in mind. It’s key to store and handle food right to keep it fresh and safe from harmful bacteria.
Temperature Control Tips
Assemble your charcuterie on the day you plan to serve it. Store it in the fridge at 40°F (4°C) or below. If you make it ahead, wrap the boxes in plastic wrap for extra protection.
Maximum Storage Duration
- Enjoy your charcuterie within 3-4 days for the best taste and safety.
- Don’t leave the boxes at room temperature for more than 2 hours. This helps keep food fresh and safe.
- If it’s over 90°F (32°C), leave the charcuterie out for only 1 hour.
Food safety is crucial when making your paper lunch box charcuterie. By sticking to these tips, you can enjoy your food knowing it’s both tasty and safe.
| Charcuterie Item | Maximum Safe Time at Room Temperature |
|---|---|
| Charcuterie meats and cheeses | 2 hours (1 hour if temperature is above 90°F) |
| Dips and condiments | 2 hours (replace every 2 hours) |
| Dessert items (pies, dips, cheesecakes) | 2 hours |
| Foods with butter or cream cheese | 2 hours |
“Proper storage and handling of charcuterie is crucial for maintaining food safety and quality. By following these guidelines, you can ensure your paper lunch box charcuterie remains fresh and enjoyable for your guests.”
Presentation and Packaging Tips
Creating a visually appealing paper lunch box charcuterie is all about presentation and packaging. Whether you’re gifting these or serving them at an event, the details matter. They can make your guests’ experience truly special.
For gifting, add a decorative ribbon or bow to the box. Use color-coordinated ribbons for special occasions. Include a mini fork or wooden picks for easy serving suggestions. Use an insulated bag to keep the boxes at the right temperature and freshness. Wrap the boxes in plastic wrap for extra protection.
Display the paper lunch box charcuterie on a decorative tray or platter. This gift packaging makes the boxes stand out at any event. With a bit of effort, you can make your guests’ dining experience both beautiful and practical.
“Creating more than 50 individual boxes was noted to be challenging due to refrigeration requirements, although it was possible with careful planning and preparation.”
The secret to great paper lunch box charcuterie is finding the right mix of function and beauty. By following these tips, your creations will not only taste great but also look amazing.
Special Occasions and Event Planning
Themed charcuterie opens up endless possibilities. Make your event catering stand out with customized boxes. For baby showers, use soft blues or pinks. Corporate events need elegance with branded items or matching colors. For a romantic date night, choose larger boxes with a variety of meats, cheeses, and treats like chocolate-dipped strawberries or macarons.
These paper lunch box charcuterie creations are great for any special event. They’re perfect for picnics, outdoor gatherings, office lunches, and holiday parties. By adding themed elements, you can turn a simple charcuterie box into a gourmet delight that impresses your guests.
Customized Charcuterie Boxes for Memorable Occasions
- Baby showers: Incorporate soft blues or pinks for a gender-reveal touch
- Corporate events: Add branded elements or coordinate with company colors
- Date nights: Upgrade to larger boxes with a wider selection and special treats
- Picnics and outdoor gatherings: Pack portable, individual-sized charcuterie boxes
- Holiday parties: Deck out your charcuterie with seasonal flavors and decorations
No matter the event, these paper lunch box charcuterie creations can make any occasion special. Customize your boxes to fit the theme. Let your guests enjoy the flavors of a memorable experience.
“Charcuterie boards have become a staple for special events, and these customizable paper lunch box versions take the concept to new heights.” – Event Planner Magazine
Conclusion
Paper lunch box charcuterie is a creative way to enjoy gourmet food on the go. It combines the beauty of charcuterie boards with the ease of portable meals. By following the tips in this article, you can make beautiful and tasty charcuterie boxes for any occasion.
The trend of charcuterie trends and the need for gourmet lunch options has made paper lunch box charcuterie popular. It’s perfect for a quick, elegant snack or for meeting different dietary needs. This method ensures a delightful and memorable meal.
Start making your own charcuterie boxes and make your meals more special. Enjoy the flavors, textures, and convenience of this trend. Discover the fun of trying new foods in a simple paper lunch box.
FAQ
What is paper lunch box charcuterie?
What are the benefits of individual portions?
What are the essential supplies needed for paper lunch box charcuterie?
What types of meats and cheeses are recommended?
How should the paper lunch box charcuterie be assembled?
How should the paper lunch box charcuterie be stored and served?
How can paper lunch box charcuterie be customized for different occasions?
Source Links
- How to Make Individual Charcuterie Boxes – Easy DIY + Supply List – https://blackberrybabe.com/2023/09/13/individual-charcuterie-box/
- How to make Easy DIY Charcuterie Boxes – https://practicallyhomemade.com/easy-diy-charcuterie-boxes/
- Charcuterie Box Ideas: The Perfect Spread | Boarderie – https://boarderie.com/blogs/charcuterie/charcuterie-box-ideas-create-the-perfect-spread-for-any-occasion?srsltid=AfmBOopesPikBEtPKPXwisgN4JFoRCN7mRF3qmQzzsaY8re7tlemxqdB
- The Ultimate Charcuterie Supplies Sourcing Guide – https://charcuterieassociation.com/charcuterie-supplies/
- Charcuterie Board: Everything You Need to Know – https://flosfavorites.com/diy-charcuterie-board/
- Charcuterie Boxes – a portable single-serving charcuterie board! – https://inspiredbycharm.com/charcuterie-boxes/
- Charcuterie Accessories: Elevate Your Spread With Essential Tools – https://charcuterieassociation.com/charcuterie-accessories/
- The Best Charcuterie Board Cheeses and Meats, According to Pros – https://www.realsimple.com/holidays-entertaining/entertaining/food-drink/best-charcuterie-board-cheeses-and-meats
- The Perfect Charcuterie Board – Tastes Better from Scratch – https://tastesbetterfromscratch.com/charcuterie-board/
- DIY Individual Charcuterie Box – https://livinginnormal.com/individual-charcuterie-box/
- Charcuterie Box – https://www.saltysidedish.com/charcuterie-box/
- Individual Charcuterie Boxes – https://www.thisvivaciouslife.com/individual-charcuterie-boxes/
- Snackle Box – the ultimate grazing box / charcuterie – https://inspiredbycharm.com/snackle-box/
- DIY Charcuterie Letter Boxes: Ideas and Tips – https://charcuterieassociation.com/charcuterie-letter-boxes/
- How to DIY Individual Charcuterie Boxes for Parties – https://www.sipandsanity.com/diy-individual-charcuterie-boxes/
- Snackle Box Ideas | Ain’t Too Proud To Meg – https://ainttooproudtomeg.com/snacklebox-tackle-box-charcuterie/
- Charcuterie Boards and Food Safety | UNL Food – https://food.unl.edu/article/charcuterie-boards-and-food-safety/
- National Center for Home Food Preservation – National Center for Home Food Preservation – https://nchfp.uga.edu/how/store/texas_storage.pdf
- On-the-Go Gourmet: Travel Charcuterie Board Ideas – https://charcuterieassociation.com/travel-charcuterie-board/
- How to Pack Charcuterie for the Perfect On-the-Go Experience – https://luxebites.com/blogs/news/how-to-pack-charcuterie-for-the-perfect-on-the-go-experience?srsltid=AfmBOoordSWLKnjTr758xfT8AKwx8kZ77l9tpC5xDG5DHJRO6NE1Endg
- Create Affordable Mini Graze Boxes Yourself – https://dimplesonmywhat.com/graze-boxes/
- Charcuterie Box Ideas: The Perfect Spread | Boarderie – https://boarderie.com/blogs/charcuterie/charcuterie-box-ideas-create-the-perfect-spread-for-any-occasion?srsltid=AfmBOoqiZ3iYu77fpfOvb4QqCFqtz6QOlR3fdlclE42wIn5joMuecj2d
- Charcuterie on Paper – https://www.pinterest.com/ideas/charcuterie-on-paper/898013780956/
- Birthday Charcuterie Board: A Deliciously Fun Way To Celebrate – https://charcuterieassociation.com/birthday-charcuterie-board/
- Mini Charcuterie Box Ideas – https://therebelchick.com/mini-charcuterie-box-ideas/
- How to Pack Charcuterie for the Perfect On-the-Go Experience – https://luxebites.com/blogs/news/how-to-pack-charcuterie-for-the-perfect-on-the-go-experience?srsltid=AfmBOooDs9zCRU65-idnFNpb-jY8gEhUp7sOJbkG3PQ_SbS4cB-LAzyj
- Delicious Charcuterie Box Lunch Recipes for Every Occasion – https://soumarecipes.com/charcuterie-box-lunch/


1 thought on “How to Create a Paper Lunch Box Charcuterie for Easy Meals”